2D Lighting and Shadows
Shadows make the world go ‘round. Thankfully 2d shadow casting is pretty easy.
I spent a good amount of time on my “lighting engine” and I’m very happy with the result (so far). There’s still quite a bit that I want to do with the lighting but that will have to be for another day. As of right now, I’ve tackled the most important thing (in my book): shadows. Without shadows, LRK’s lighting system is VERY similar to TWC’s (with a few improvements). It took a lot of work to get to where I am now and I thought what I learned was worth sharing. For the first time on my blog I’m going to go over how I did what I did. Once that’s done, I’ll briefly go over what I could do better and what I have planned for my lighting engine’s future.
The Light Map
The general method to my lighting engine is as follows:
- Create a new Frame Buffer (light map) to draw the light map on.
- Fill the light map with the ambient light color
- Draw the lights to the light map with an additive blend mode.
- Draw the light map over the game’s graphics component with a multiplicative blend mode.
To add shadows, I do this for each light before I draw it to the light map:
- Draw the light image to another Frame Buffer (light buffer).
- Tint the light buffer with the light’s color by filling the light buffer with a color while using a multiplicative blend function.
- Draw the shadows over the light buffer in black.
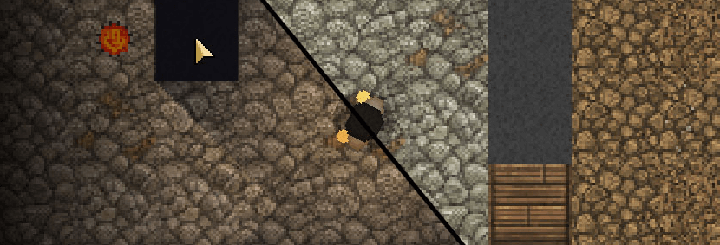
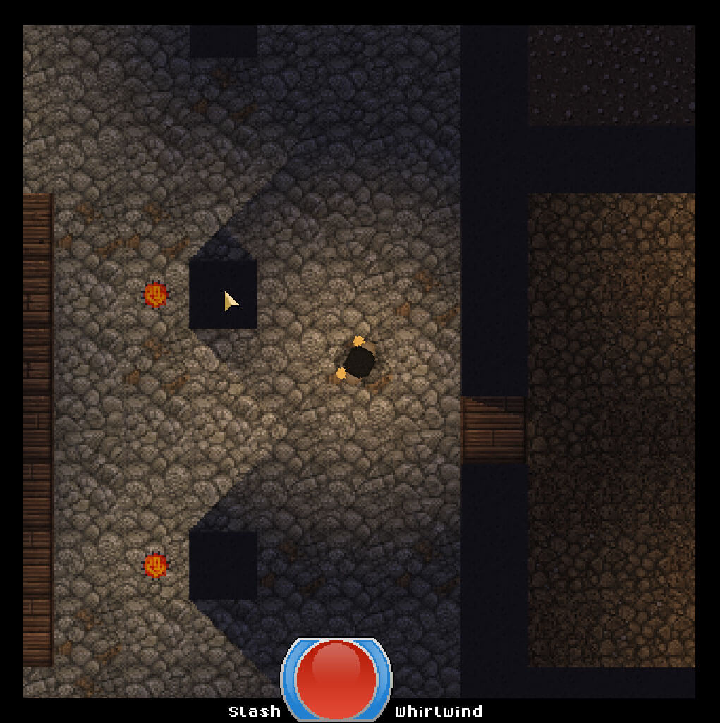
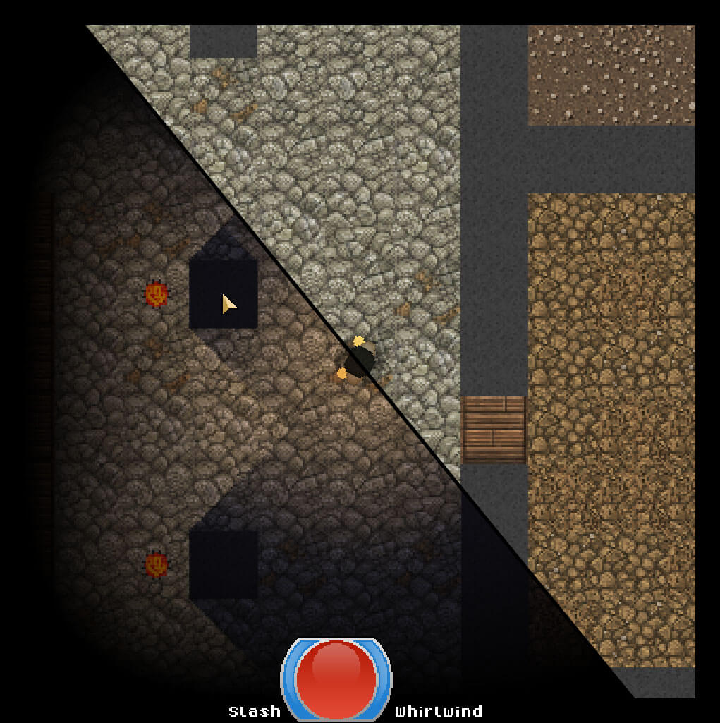
Here are some visuals to help you follow along. For comparison here is what the game looked like before I added any kind of lighting.
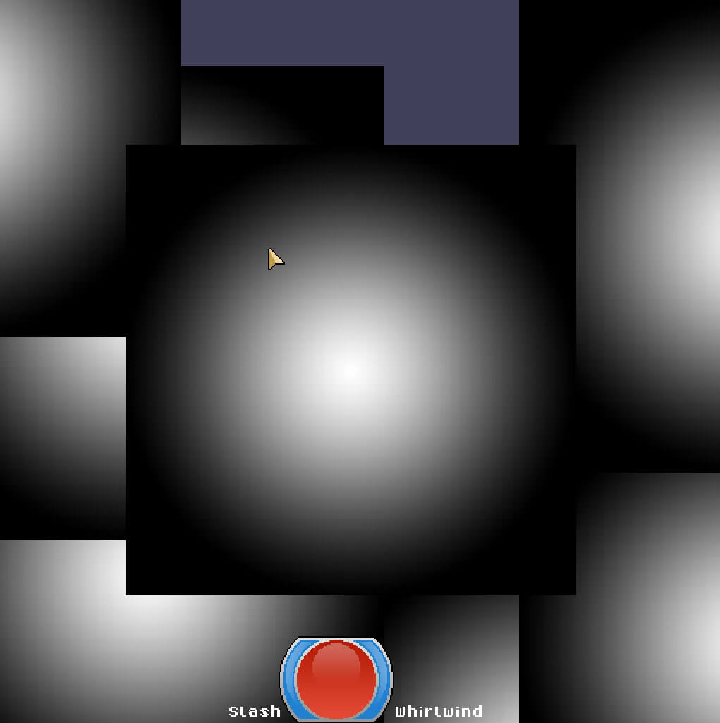
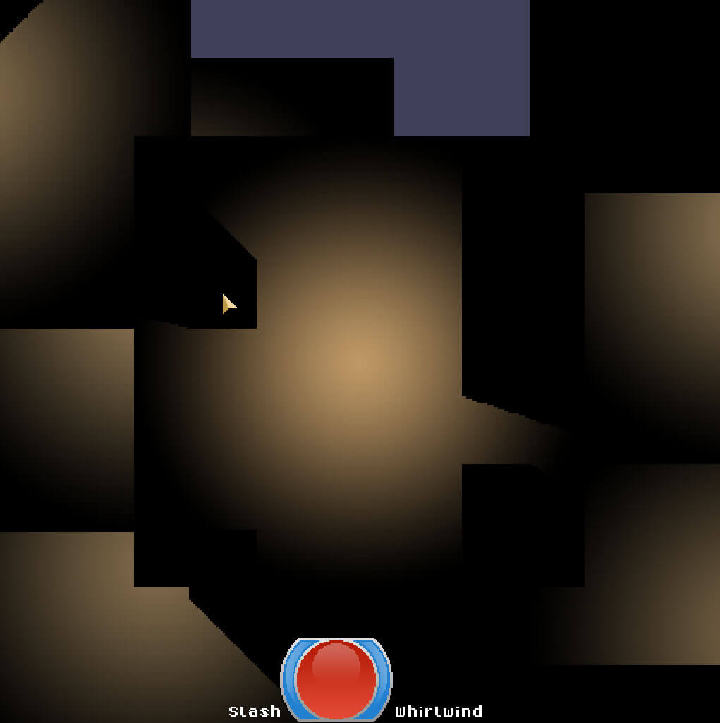
The first step is to create the light map and fill it with ambient light. For this demonstration, I am not using a blend function to draw the light map so it’s easier to see what’s going on.

Then, I draw each light over the light map.
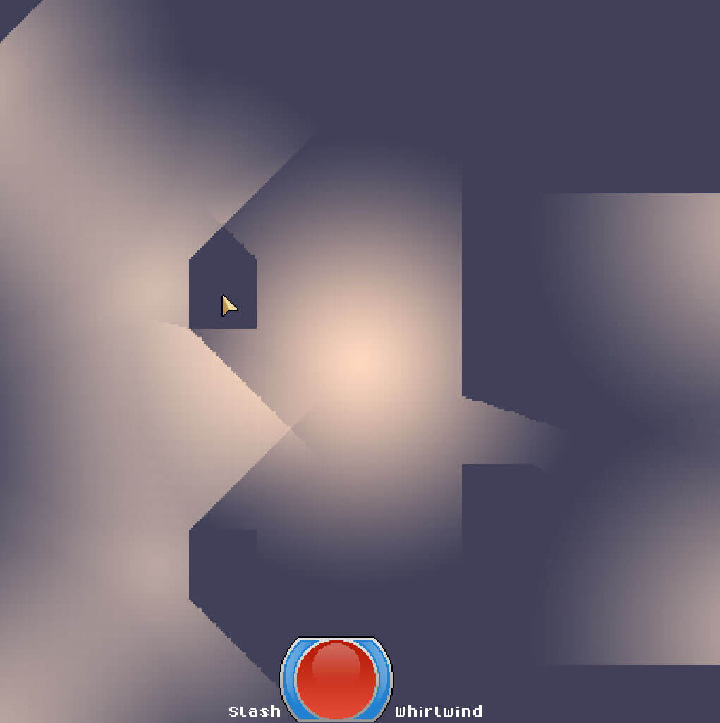
For each light, I fill the light buffer with the light’s color using a multiplicative blend function. (Note, this is not the actual order of drawing, I would tint the image as I draw it. I separated the steps here to make it easier to follow.)
Then for each light I remove the shadows (I’ll go over this later) by simply drawing a black polygon where the shadow should be. (Again, this should be done to the light buffer BEFORE drawing the light to the light map.)
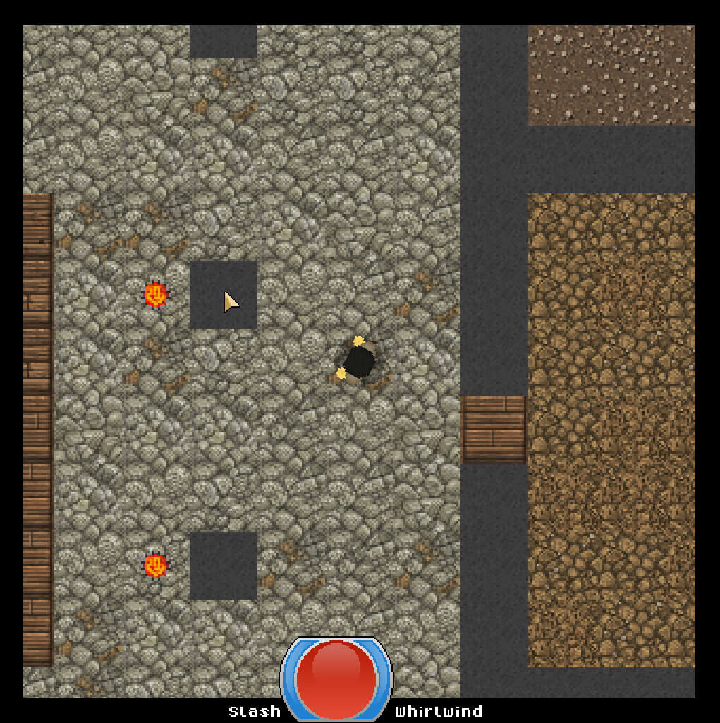
To add the lights to the light map in a “lighty” way, I draw each light buffer to the light map with an additive blend function. You can see the sources of light and their shadows very well here.
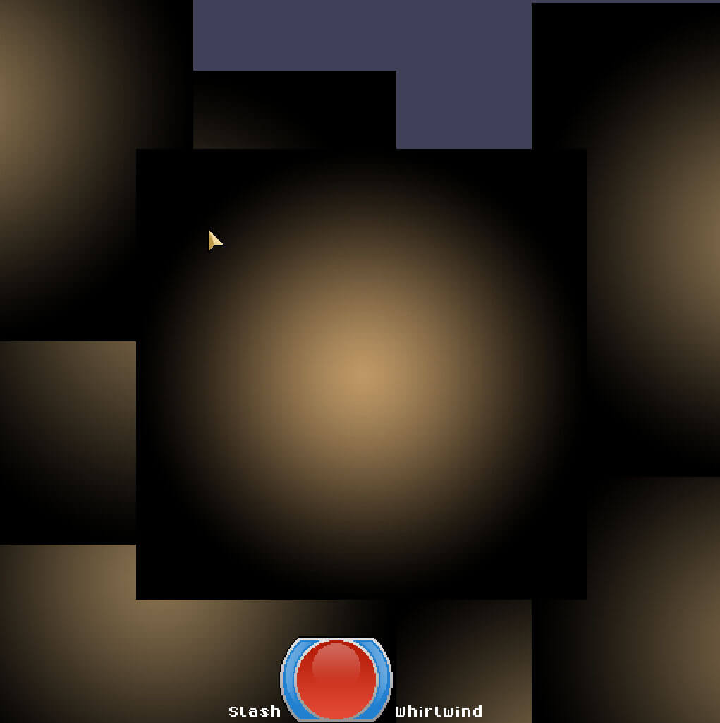
Now, when I draw the light map to the game’s scene I use a multiplicative blend function and TA-DAH, light has been born.
To make the render distance (which is determined by the light the character is holding) less harsh, I draw a simple vignette around the images (which is just a scaled, transparent, black image).
And for a final comparison. The difference is night and day - lighting adds so much more to the game than I thought it would.
Here’s a live-action demo of the lighting in action. This video also features a giant horde of slimes and an OP player.
Shadows
I would not have been able to work out these shadows without the help of this video: Here. I would strongly suggest you watch that video if you really want to understand how this works as he gives a lot of good visuals. I will admit, I have become a bit of a graphics softie thanks to using Slick2D, so I adopted his method and came up with another, less efficient way to go about it.
When I load the map, I create the 2D world with JBox2D based on a collision layer in the Tiled map. When I create a static wall with JBox2D, I also keep an array of lines (2 points) for each wall’s edge. I use these lines as “light blockers”. After I draw the light image to the light buffer, I pass the light buffer, the lights position and other world data to a method. This method then goes through each of these shadow lines that intersect the light’s affected area.
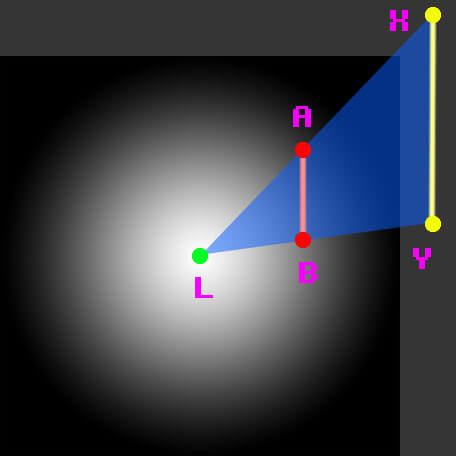
This diagram shows the light image, 5 points, the shadow line and the triangle of light we’re working with. For each shadow line (here the line is A,B), you can make a triangle of light that should be shown (here it’s the triangle L,A,B). If we think of this triangle as a point and 2 vectors (point L with vectors L>A and L>B) we can scale the vectors equally to create a similar (larger) triangle (L,X,Y). Then, if we subtract the original triangle from this bigger one we end up with a polygon (A,X,Y,B) that encloses the space the shadow this line produces from this light. Once we have that polygon, we can simply draw it over the light buffer as so:
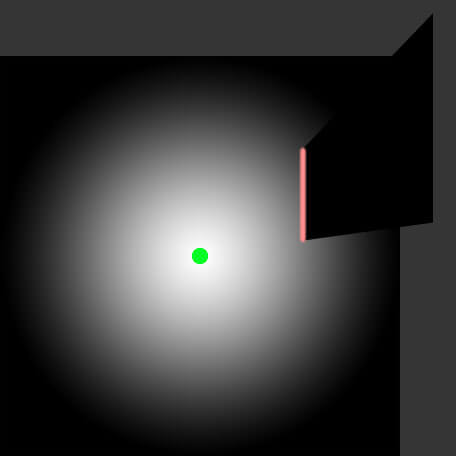
I left the point of the light and the shadow line in this image for demonstration. Also note the dark grey is outside of the light buffer and is not actually drawn to the screen. This happens for every shadow line we have.
What I Could Do Better
There is one major thing I could do more efficiently, but for right now the system is alright as performance is not hurt too harshly from my not-so-efficient ways. As described in the above video, the best way to implement the 2D shadows is to draw a triangle fan that is constructed by clipping a quad where there is an intersecting shadow line with the light’s image as the texture. This would give many fewer draw calls and less resources. If I implemented it this way, each light could be drawn directly to the light map without the need of a separate buffer to draw the shadows.
Another minor issue is the number of calculations per frame I have to make for each light. Most lights are static in their position. I don’t plan to have moving entities that create light shadows, so I could pre-calculate each triangle fan or shadow map when the light is generated. If I use this method, I would have to update any lights’ shadow maps when the surrounding environment changes (door opens, gate closes, etc).
The Future
The biggest thing I’d like to add in the future is a shader to blur the shadow edges. This would do a couple things:
- It would ease the shadows by keeping the shadow/light contrast from being so sharp.
- It would add the illusion of the umbra family. (more realistic lighting)
- And finally it would allow the player to better see the edges of the surrounding walls’ textures which would add more character to each map.
Another small thing I’d like to do is to adjust the blending function of the lights being drawn to the light map. Right now, things can become very “washed” when there are lights close together. In TWC I combated this with alpha blending, but lights that are drawn later still overpower lights drawn before it. I’m not sure if there is a better way to go about this blending, but I want there to be.
PS: I would like to give a shout out to John Smith for this John Smith’s texture pack. I used textures from his Minecraft texture pack for this demo.